Visa Application Guide for Filipinos: Avoid Rejection & Travel with Confidence
Planning an international trip but feeling overwhelmed by the visa process?
Whether you're dreaming of cherry blossoms in Tokyo, cafe-hopping in Paris, or chasing auroras in Iceland, one thing stands between you and your dream vacation: a visa.
And for many Filipino travelers, this step can feel like the most intimidating part of the journey. From deciphering embassy websites to gathering the right documents, one missing detail can lead to a dreaded rejection.
Did you know?
In 2022, the Philippines had a 31.1% Schengen visa rejection rate—among the highest in Southeast Asia.
The Embassy of Japan also warns that submitting fake or incomplete documents could get you banned from reapplying for 6 months.
But don’t let the paperwork kill your wanderlust. This is your ultimate visa application cheat sheet—tailored for Filipino travelers.
Inside this guide:
Most common types of travel visas for Filipinos
A step-by-step visa application process (with zero guesswork)
Why travel insurance is required—and how to get one fast
Smart tools to stay organized and avoid info overload
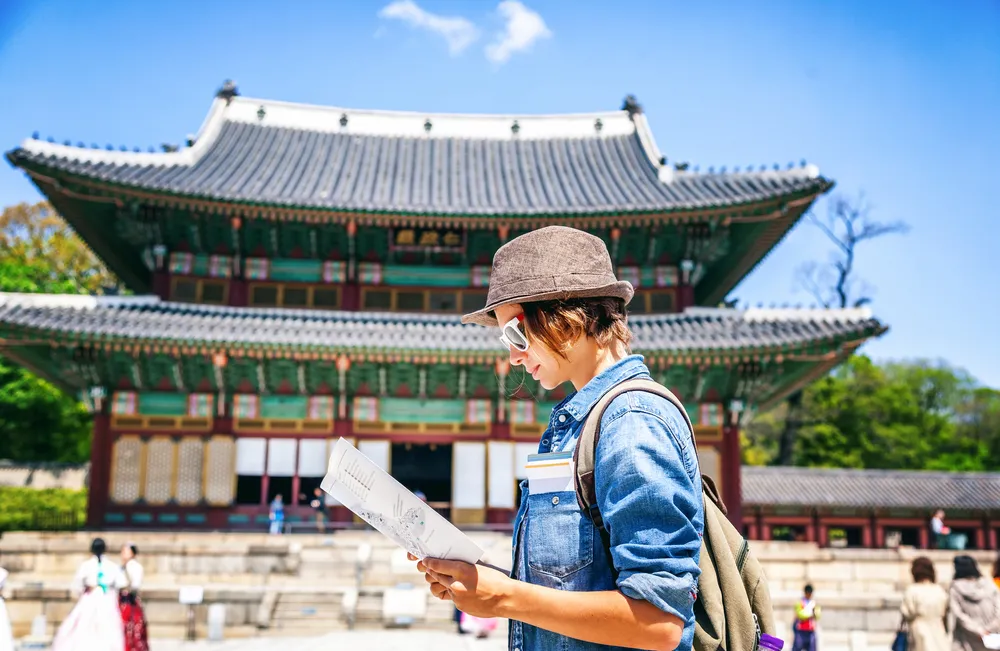
Whether you're planning a long-awaited Euro trip or a first-time adventure to Korea or Japan, this guide will help you go from “Saan ba ako magsisimula?” to “Visa approved!”—faster and stress-free.
Why Do Visa Applications Feel So Complicated?
Because… they are. And yes, it's on purpose.
Visa applications aren’t designed to be easy. Countries use them to screen travelers, minimize risks, and make sure you won’t overstay or run out of funds abroad. That’s why you're faced with a mountain of requirements—bank statements, COEs, hotel bookings, and more.
For Filipino travelers, this often means getting lost in vague embassy websites and doom-scrolling through Reddit visa horror stories just to figure things out.
Frustrating? Definitely.
But the good news? You’re not alone—and we’re here to simplify the process for you.
Top Visa Application Stress Points for Filipino Travelers (And How to Handle Them)
Let’s be real—just thinking about your visa application can already feel stressful.
Here are some of the most common struggles Pinoy travelers face:
“Di ko alam kung saan magsisimula…”
Should you book your flight first? Hotel? Or wait for your visa? The confusion is real.
Missing or incorrect documents
From outdated bank certificates to “wala pa palang travel insurance,” small errors can cause big delays.
Fear of getting denied
Even if your documents are complete, there’s always that lingering thought: “What if they still say no?”
Group travel pressure or fixed dates
Joining a barkada trip or tour package? The pressure to get approved on time is even higher.
But here’s the thing: with the right prep, timeline, and travel hacks, the visa process doesn’t have to be panic-inducing.
Let’s take the guesswork out of it—starting with the most common types of visas Filipino travelers apply for.
Types of Visa Applications for Pinoy Travelers
Planning to travel soon? Here’s a quick and easy breakdown of the visa types most Pinoys apply for—plus how much they cost and how long they take:
Country/Region
|
Visa Type
|
Processing Time
|
Visa Fee (PHP)
|
|---|
Japan
|
Tourist
|
7–10 business days
|
~2,000–3,000
|
South Korea
|
Tourist (C-3)
|
10–15 business days
|
~2,000
|
Schengen (EU)
|
Short-Stay
|
15–20 business days
|
~4,500–5,000
|
USA
|
B1/B2 (Tourist)
|
~2 months (interview)
|
~9,000+
|
Australia
|
Visitor
|
3–4 weeks
|
~7,000+
|
Disclaimer: Visa fees and processing times may vary depending on the embassy, season, and your travel history. Always verify through official embassy websites.
Tip: Avoid relying solely on vloggers or Facebook groups—visa rules change, and outdated info can lead to costly mistakes. Official sources are your best bet!
Now that you know which visa you need, let’s walk through the must-have documents to get you one step closer to “Visa Approved!”
Visa Application Checklist: What You’ll Need
Your quick guide to preparing the essentials—because missing one document could cost you that dream trip.
Requirement
|
Details / Notes
|
|---|
Passport
|
Must be valid for at least 6 months beyond your travel dates
|
Application Form
|
Download from the official embassy website only
|
Passport Photo
|
Usually 2x2 or country-specific size. Always check embassy guidelines
|
Travel Itinerary
|
Flight and hotel reservations (not always required to be paid upfront
|
Proof of Financial Capacity
|
Bank certs, 3-month SOA, ITR, COE
|
Travel Insurance
|
Required by Schengen, Japan, South Korea, and more — must have minimum €30,000 coverage
|
Cover Letter
(optional but very helpful)
|
A personal note to explain your travel purpose and plans
|
Visa Fee
|
Pay in cash or bank deposit, depending on embassy instructions
|
Note: This list covers most tourist visa applications, but always double-check specific embassy requirements.
Even with complete documents, some applications still get denied.
It’s often due to unclear travel intent, inconsistent documents, or lack of insurance. So, always double-check everything!
Need reliable, embassy-compliant travel insurance? Check out Oona’s flexible plans to help you secure your visa with confidence.
6 Common Reasons Why Pinoys Get Visa Denied
Got all your documents but still worried about getting denied? You’re not being paranoid—even complete applications can be rejected. Here’s why:
1. Inconsistent Financial Docs
Embassies don’t just check if you have money—they check if your finances make sense.
If your bank account suddenly has a large deposit before your application, but you can’t explain where it came from (salary? loan? sponsor?), it raises a red flag. They’re looking for consistent savings and income, not one-time show money.
Tip: Build your bank history early. Include proof of employment, payslips, and ITR to show stable income.
2. Overstaying in Prior Visas or Immigration Violations
If you’ve previously overstayed a visa, been deported, or violated immigration rules in any country, your record follows you. Embassies share data—especially within Schengen, Five Eyes, and other regional alliances.
Tip: Always respect visa terms. If you've had past issues, be honest in your application and explain with documents.
3. Missing or Invalid Travel Insurance
Many embassies, including those for Schengen countries, South Korea, and Japan, require travel insurance with minimum coverage (usually €30,000) for medical emergencies.
Lacking this, or submitting a policy that doesn't meet requirements, can get your application rejected, even if the rest is perfect.
Tip: Choose travel insurance providers that are recognized by embassies (like Oona). Make sure it covers the right period and benefits.
4. Fake or Tampered Documents
Submitting fake COEs, bank statements, IDs, or invitation letters is a guaranteed rejection—and in many cases, a ban from reapplying for 6 months to several years. Japan and Korea, in particular, are strict about this.
Tip: Always go the legit route. It’s better to be denied for honesty than banned for faking.
5. Unclear or Unconvincing Purpose of Visit
If you’re applying for a tourist visa but have no itinerary, no letter of explanation, or vague travel plans, embassies may doubt your intent. It’s not enough to say “I want to explore.” They want to see structure—where, when, how.
Tip: Submit a detailed travel itinerary, and include a cover letter that explains your purpose and timeline clearly.
6. Poor Interview Performance (especially for US/AU visas)
For countries that require interviews, like the U.S. and Australia, what you say—and how you say it—matters. Nervous, inconsistent, or unclear answers can raise doubts, even if your documents are fine.
Tip: Practice common interview questions beforehand. Be honest, confident, and consistent with what’s written in your documents.
Final Thought:
Getting a visa isn’t just about filling out forms. It’s about showing proof that you’re a genuine, responsible traveler who plans to return to the Philippines.
7. With the right timeline, honest documents, and proper support (like valid travel insurance and clear financials), you can boost your chances of approval—no need for guesswork or stress.
Want to avoid errors? Check out: Your Guide to Obtaining a Schengen Visa from the Philippines
Must-Have Tools for Stress-Free Visa Planning
Visa applications don’t have to be chaotic—as long as you have the right tools, timeline, and mindset. Whether you're aiming for Europe, Japan, Korea, or anywhere else with visa requirements, the secret is planning ahead.
Here’s a step-by-step visa planning timeline to help you stay on track and avoid last-minute panic.
Visa Planning Timeline (Ideal for Tourist Visas)
Time Before Trip
|
What to Do
|
|---|
3–4 months before
|
Choose your destination and check the latest visa requirements from the official embassy website. Look into the type of visa you need, processing times, and whether you’ll need a personal appearance.
|
2.5 months before
|
Start preparing your documents: request your Certificate of Employment (COE), Income Tax Return (ITR), bank certificate, and any other required financial proofs. Begin drafting a cover letter and planning your travel itinerary.
|
2 months before
|
Submit your visa application. This is also the best time to purchase embassy-compliant travel insurance—required by Schengen countries, Japan, Korea, and more. Make sure the coverage meets the minimum requirements (e.g., €30,000 medical coverage).
|
1 month before
|
Once your visa is approved, confirm your flight and hotel bookings, and start shopping for travel essentials—think weather-appropriate clothing, adapters, and travel-size toiletries.
|
1 week before
|
Final prep: print your documents, organize your travel folder, and assemble your airport kit. This includes your passport, visa, insurance policy, embassy contacts, itinerary, and hotel/reservation details. Don’t forget a digital backup on your phone or email.
|
Disclaimer: The timeline provided is a general guideline for tourist visa applications and may vary depending on the destination country, embassy processing times, and individual circumstances. Always refer to the official embassy or consulate website of your destination for the most accurate and up-to-date information.
Here’s what should be in your visa planning toolkit:
Document Tracker or Checklist
Keep track of what you’ve completed and what’s pending—especially helpful if you’re applying for multiple visas or traveling with a group.
Folder or Travel Wallet
Organize all your papers in one place: your passport, visa, travel insurance policy, flight and hotel bookings, itinerary, bank certificates, COE, etc.
Google Drive or Cloud Backup
Scan and upload copies of all your documents to a secure cloud folder. This is a lifesaver if you lose anything during your trip.
Embassy-Recognized Travel Insurance
Often overlooked, but required by many embassies. Oona offers flexible, embassy-compliant travel insurance plans that are fast to issue, easy to download, and meet the minimum coverage standards.
Language Support Apps
If you're traveling to non-English-speaking countries, tools like Google Translate can help during your trip—and even during your visa interview prep.
Expense Planner or Budget App
Show that you’re financially prepared by having a realistic budget breakdown for your trip. This can also help strengthen your visa application if you're asked to explain your travel funding.
Tip: Store everything in a labeled folder (physical + digital). Include your:
Travel insurance policy number
Embassy contact information
Accommodation and flight details
Emergency contacts both abroad and in the Philippines
Visa applications can be tricky, but with a smart strategy, you’ll go from overwhelmed to fully prepared—and one step closer to “Visa Approved!”
Why Travel Insurance Is Required for Visa Approval
If you’re applying for a visa, travel insurance isn’t just a nice-to-have—it’s a must. Many embassies won’t process your application without it, and for good reason.
But Why Is It Required?
Embassies want to make sure that if you get sick, have an accident, or face an emergency abroad, you won’t rely on their healthcare system or become a financial liability.
Having valid travel insurance proves that:
You’re a responsible traveler
You have financial backup in case of emergencies
You’re prepared for unexpected situations—from flight delays to hospitalizations
Minimum Travel Insurance Coverage (as of 2025):
Destination
|
Required Coverage
|
|---|
Schengen Area
|
At least EUR 30,000 (around ₱1.8M) for medical emergencies, valid in all 27 Schengen countries
|
Japan
|
Often required before visa release—especially via accredited travel agencies
|
South Korea
|
Increasingly required upfront for first-time applicants and package tours
|
Disclaimer: Travel insurance requirements are subject to change and may vary depending on the traveler’s nationality, visa type, or specific consular instructions. Always confirm the latest requirements with the official embassy or visa application center of your destination before applying.
Why Get Travel Insurance from Oona?
With Oona Travel Insurance, you get:
Instant policy confirmation you can print or submit to the embassy right away
Single or multi-trip options—perfect for both one-time getaways or frequent flyers
24/7 global emergency support if anything goes wrong abroad (from hospital bills to lost luggage)
Embassy-compliant documents—ready for Schengen, Japan, Korea, and more
Get Your Travel Insurance Here
Visa approved? Awesome! But before you start packing your bags, make sure you know what to do next.
Up ahead: What happens after your visa is granted—and how to prepare for takeoff.
Real Talk: What Happens After You Get Approved
Once you get that shiny visa sticker:
Double-check validity dates – some visas allow entry only within a window
Book flights and accommodations (if you used dummy bookings before)
Prepare your arrival documents (especially for Korea or Japan)
Still nervous? Here’s a checklist to print and bring with you:
Item
|
Checked
|
|---|
Valid passport + visa
|
☐
|
Return ticket
|
☐
|
Travel insurance copy
|
☐
|
Hotel confirmation
|
☐
|
Emergency contact numbers
|
☐
|
Planning with confidence = traveling with peace of mind. With all that squared away, you’re finally ready to pack your bags and go.
Conclusion: Travel Confidently, Visa-Ready
The visa process can feel like a maze, but with the right info and preparation, you can confidently step into any embassy, complete docs in hand, and walk out ready to fly.
By understanding what embassies are really looking for—honest documentation, financial preparedness, and valid travel insurance—you set yourself up for approval instead of anxiety.
And remember: travel insurance isn't just a requirement—it’s peace of mind. Whether you're heading to Seoul, Paris, or Osaka, being insured means you're backed up when things go wrong (flight delays, medical issues, lost luggage—you name it).
Ready for that adventure? ✅ Get your visa-approved travel insurance now